How to create a project
The platform allows you to create, configure, and publish circuit design projects. Follow the steps below to set up a new project and upload your circuit files.
1. Create a New Project
- Navigate to the Projects page from the Dashboard after logging in.
- Click Add New Project.
- Enter the required project details:
- Project Type
- Project Name
- Description (optional)
- Project Tags (optional)
- Project Image (optional)
- Click Save Project to proceed.
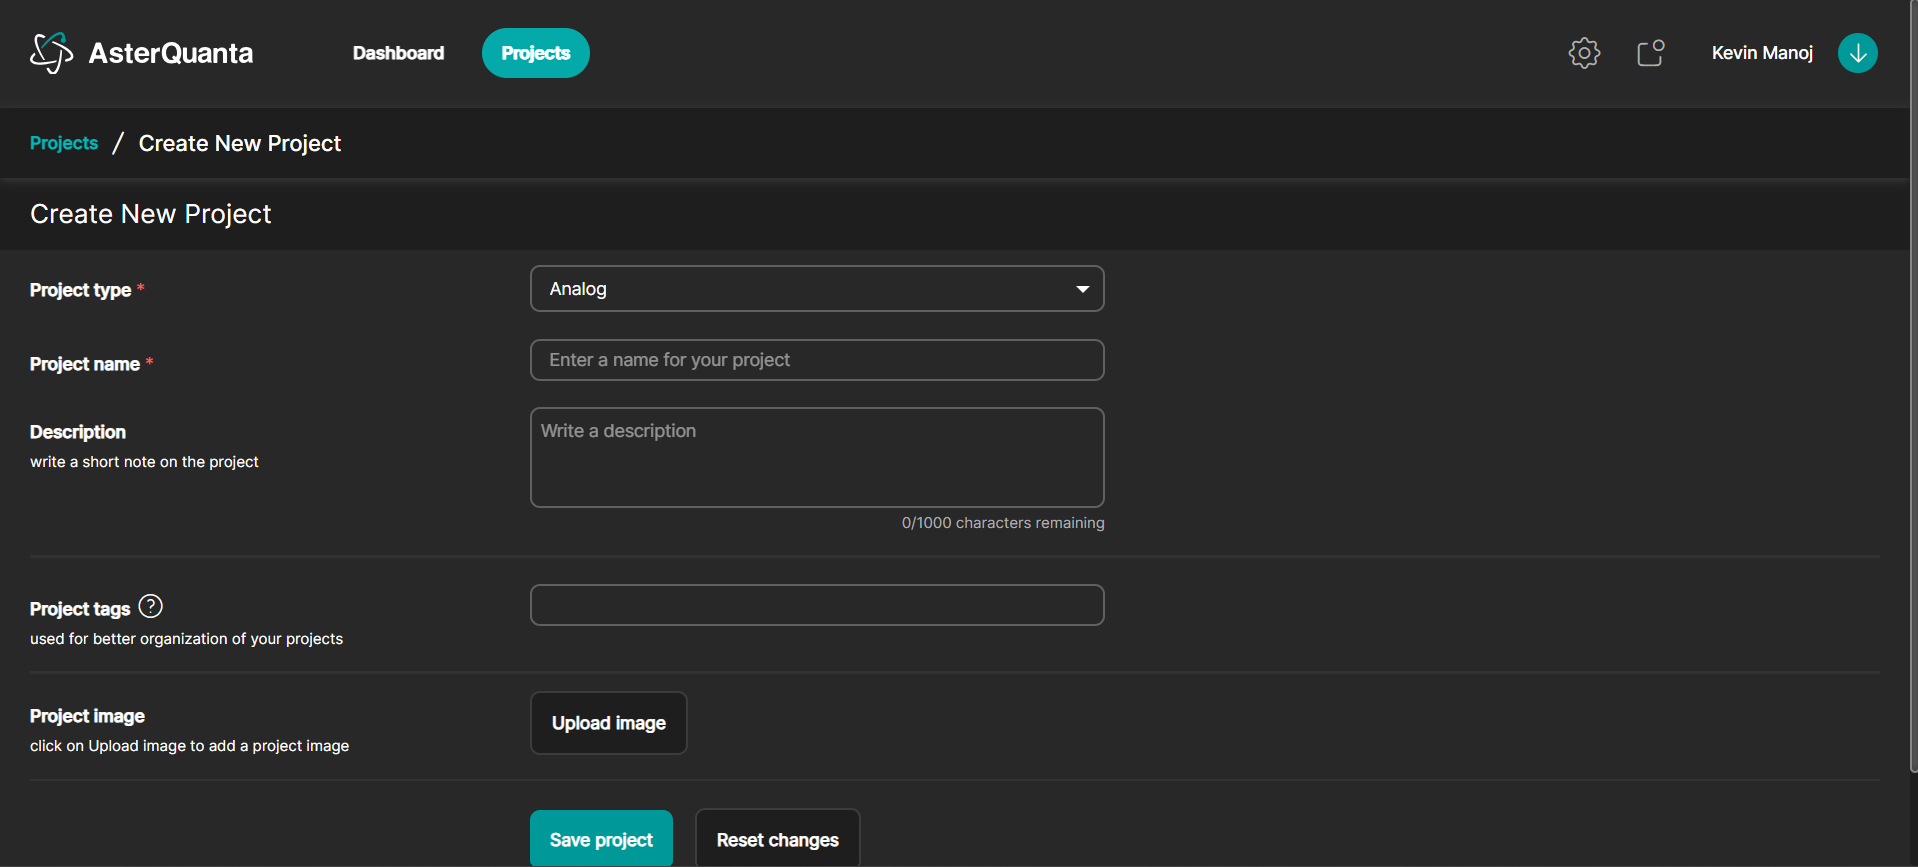
After saving, you will be redirected to the Upload Circuit page.
2. Upload Circuit Information
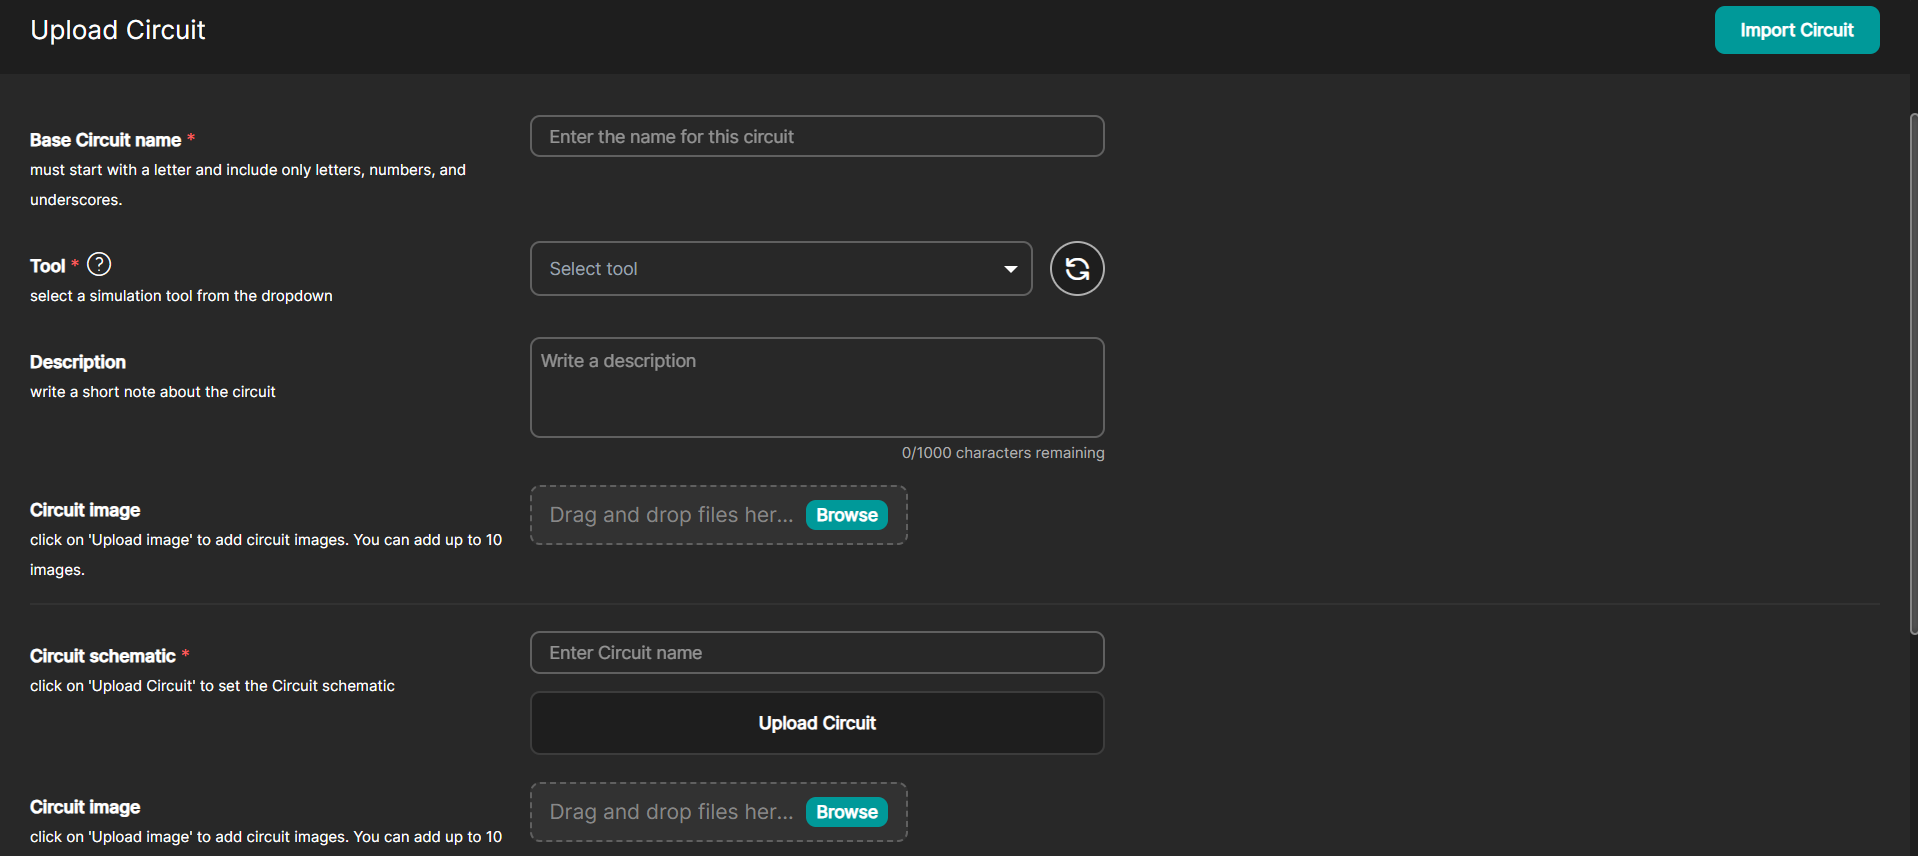
The Upload Circuit page allows you to define your circuit by adding all the files and details required for simulation and optimization. This step helps the platform understand how your circuit is structured, which tools it should use, and what additional resources are needed to run it correctly.
Circuit Details
Circuit Name
Provide a clear and meaningful name for your circuit. The name should begin with a letter and may contain letters, numbers, and underscores. This helps you easily identify and manage your circuit within the project.
Tool
Select the simulation tool used to create or run this circuit. You can choose between LTspice and NGspice, depending on the tool used to design or simulate your circuit. This ensures compatibility and allows the platform to process the circuit correctly during simulations and optimizations.
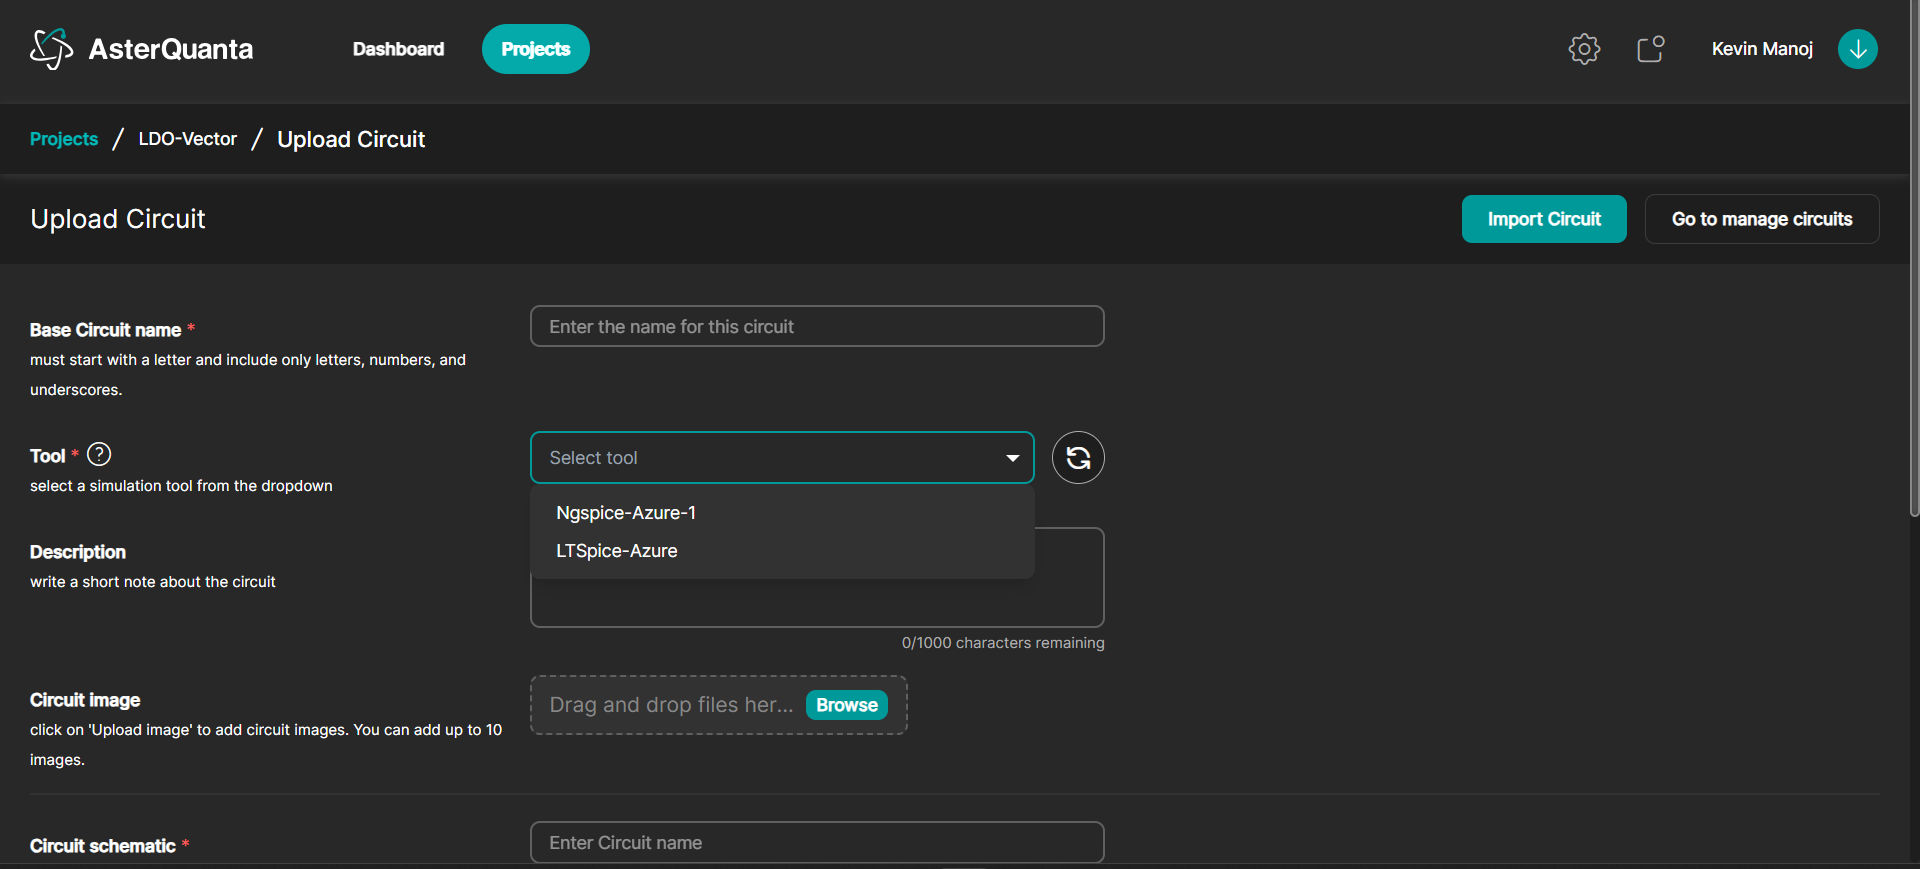
Description (Optional)
Add a short description explaining the purpose or functionality of the circuit. This is useful for documentation, collaboration, and future reference.
Circuit Image (Optional)
Upload images of your circuit schematic or layout to visually represent the design. The platform supports JPG, JPEG, and PNG image formats, and you can add up to 10 images, which helps others quickly understand the circuit without opening the schematic file.
Circuit Schematic or Netlist
Upload the main circuit file, either as a schematic or a netlist. This is the core definition of your circuit and is required for simulation and analysis.
Circuit Dependencies (Optional)
Dependencies
Select the type of dependency and upload the required files. Dependencies can include Models, Sub-Circuits, Libraries, or Symbols that your circuit relies on.
Dependencies are supporting resources that enable accurate simulation, validation, and optimization of your circuit. Adding the correct dependencies ensures that all components behave as expected and that simulations run without errors.
To understand what each dependency type represents and when to use them, refer to the Dependencies page for a detailed explanation and examples.
You may also choose to Import Circuit if you have a previously saved circuit configuration.
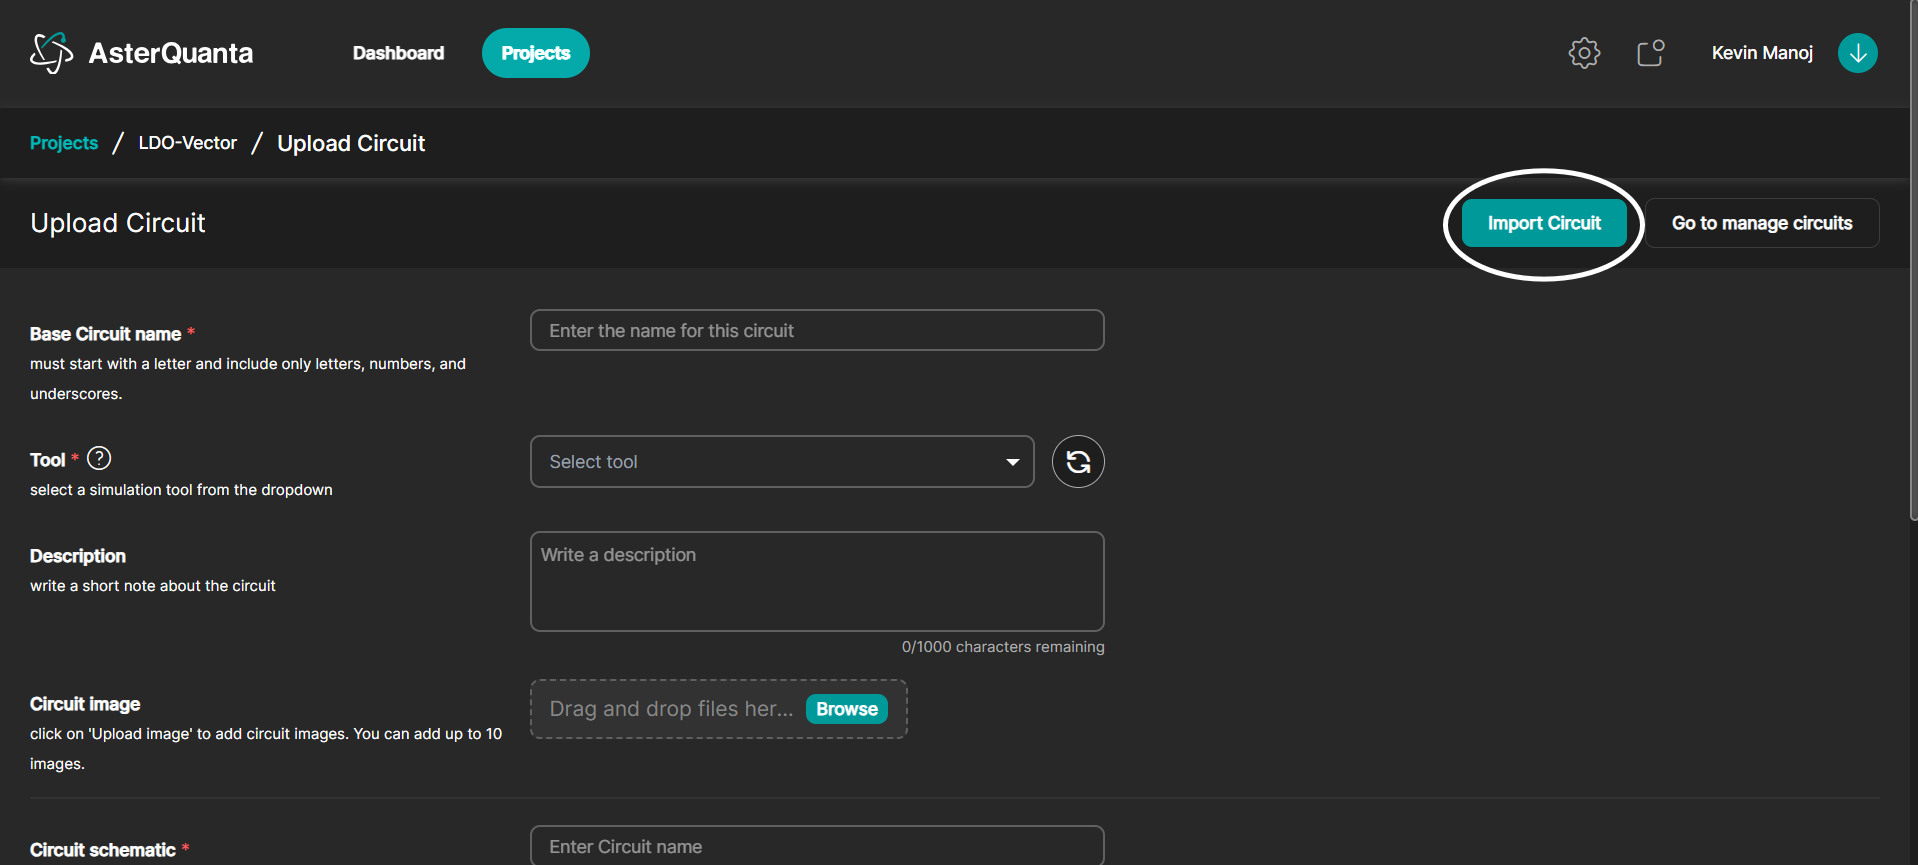
When you click on that button, this is what you will see:
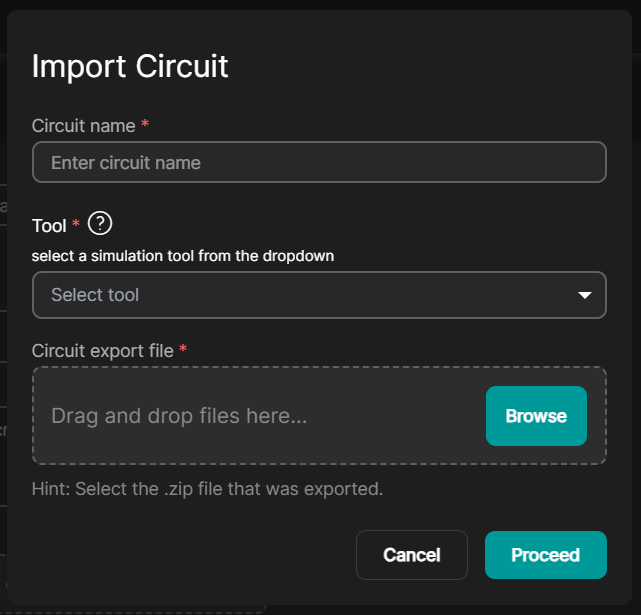
Available actions:
- Save Circuit
- Save & Add Another
- Reset Changes
3. Configure Circuit Parameters
Each circuit includes three key configuration sections:
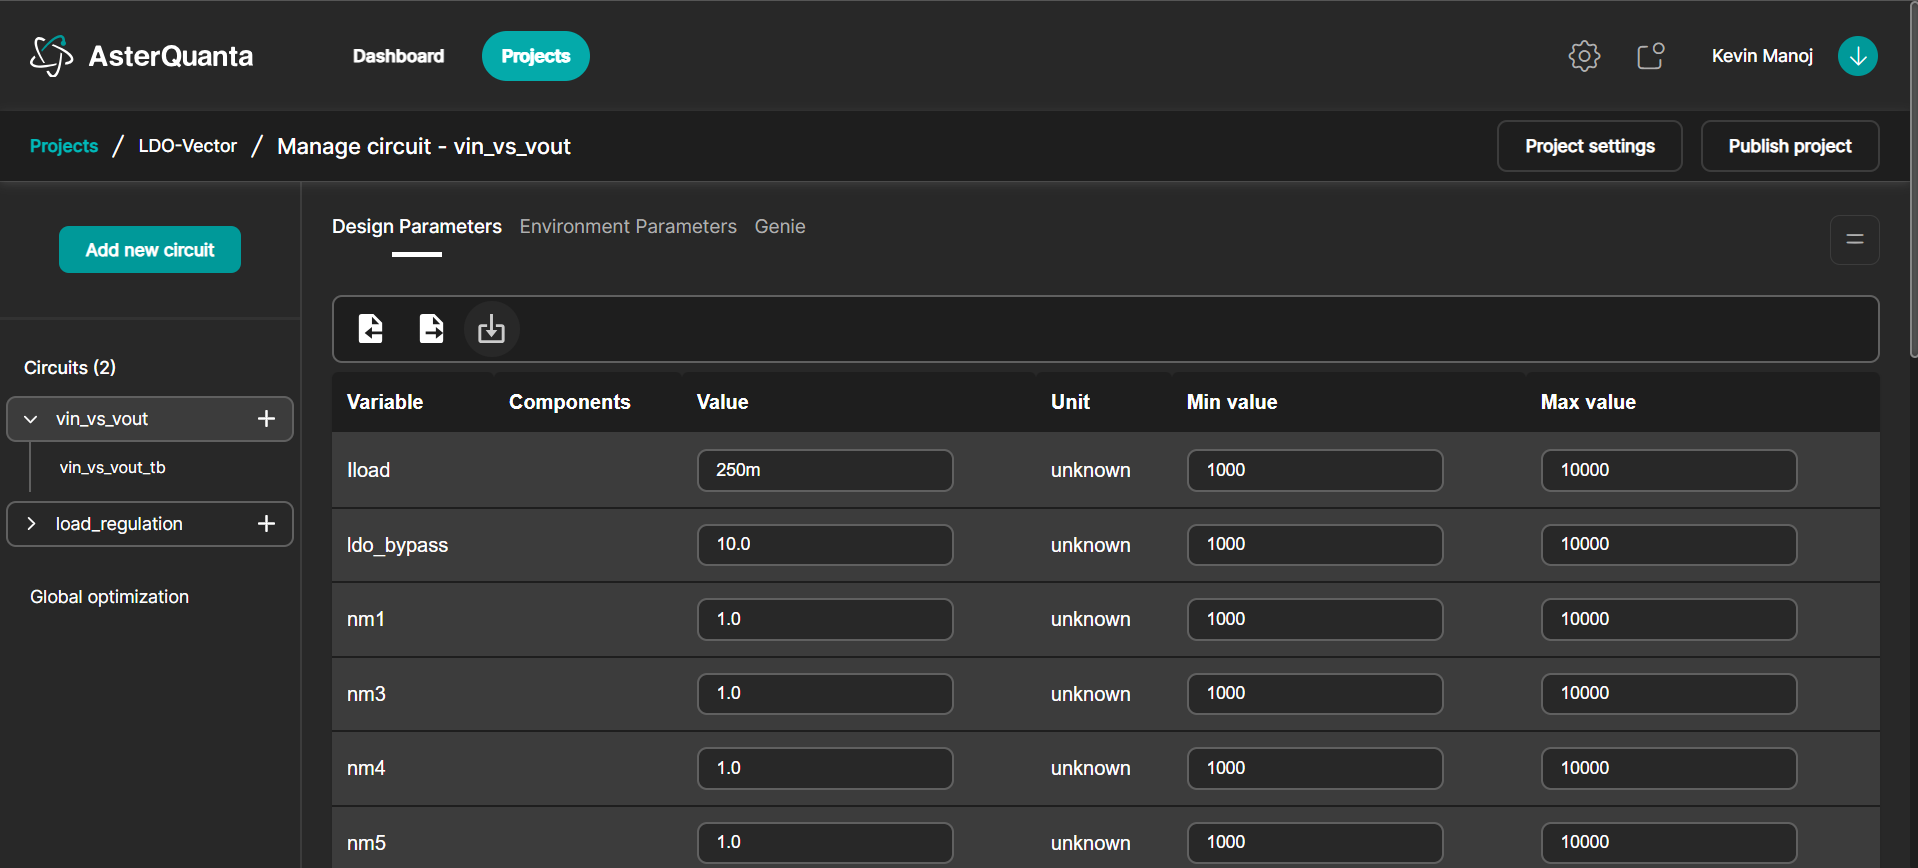
Design Parameters
This section contains a table with the following columns:
- Variable
- Component
- Value
- Unit
- Min Value
- Max Value
You can enter values for Value, Min Value, and Max Value.
Additional options:
- Import from File
- Export to File
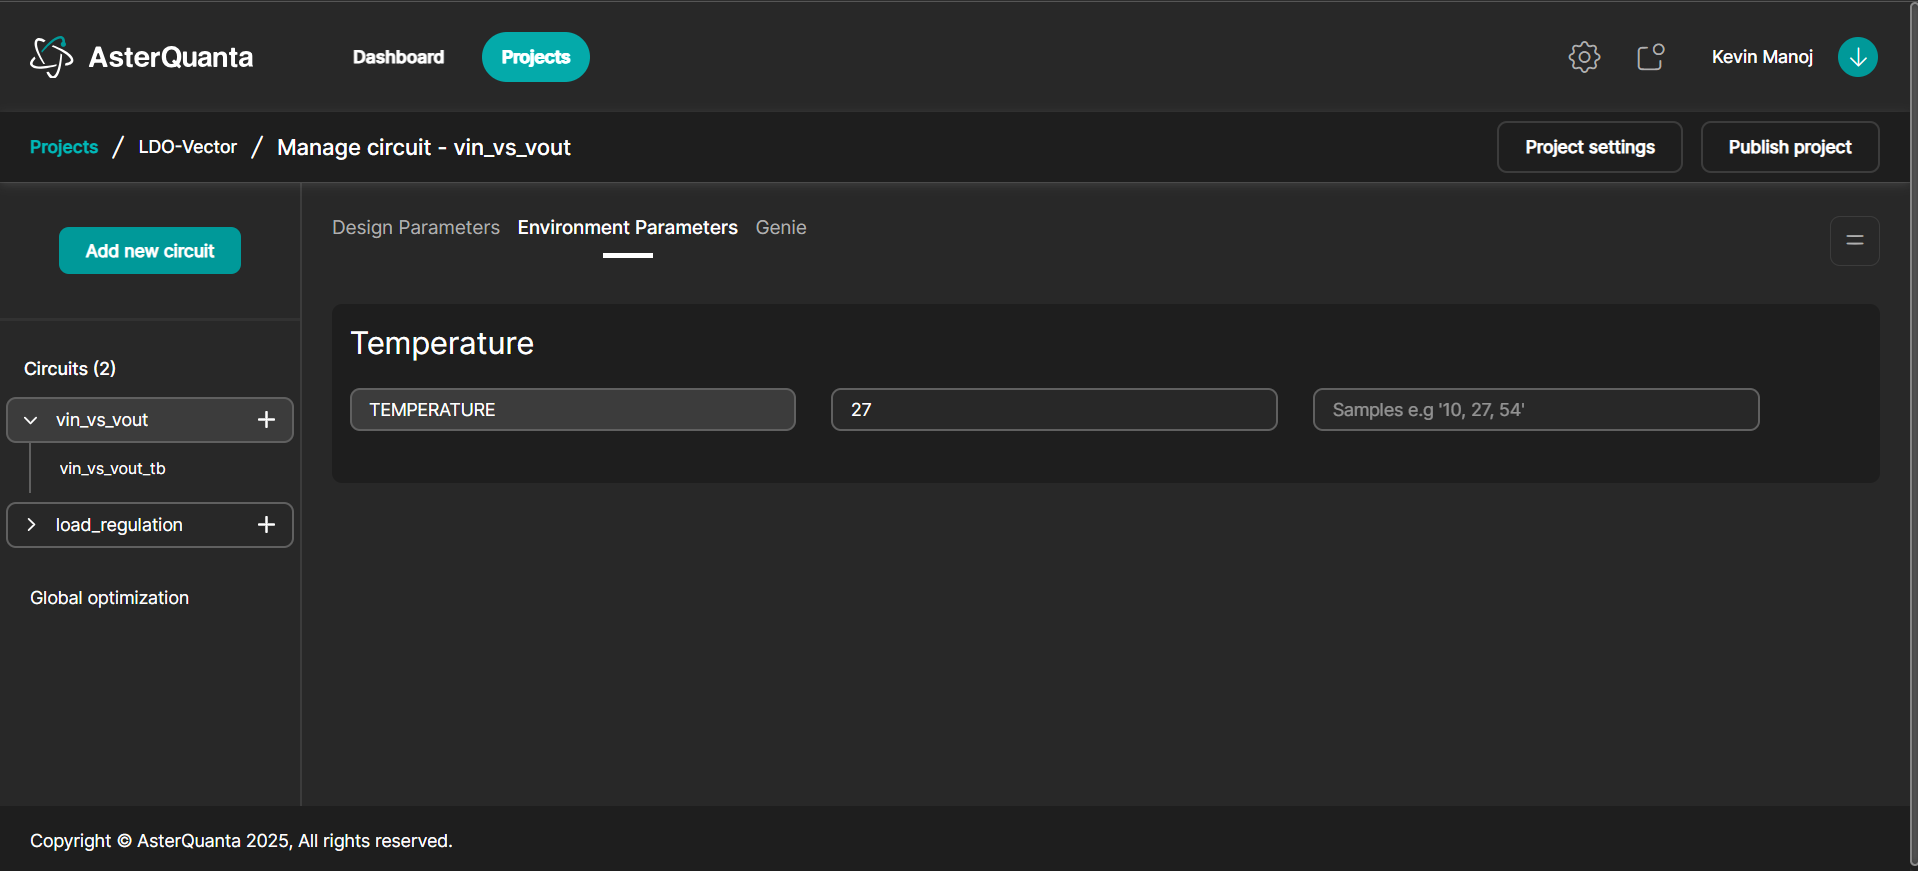
Environment Parameters
Define external simulation conditions such as:
- Process corners
- Temperature variations
- Sweep parameters
These settings allow you to evaluate circuit behavior across different operating scenarios and edge cases.
Genie
This section provides access to AI-driven optimization:
- Select an Agent from the drop-down list to optimize the uploaded circuit.
- Access tools such as:
- View Log List
- Download Netlist
- Click Genie Optimize to begin the optimization process.
4. Manage Project Settings
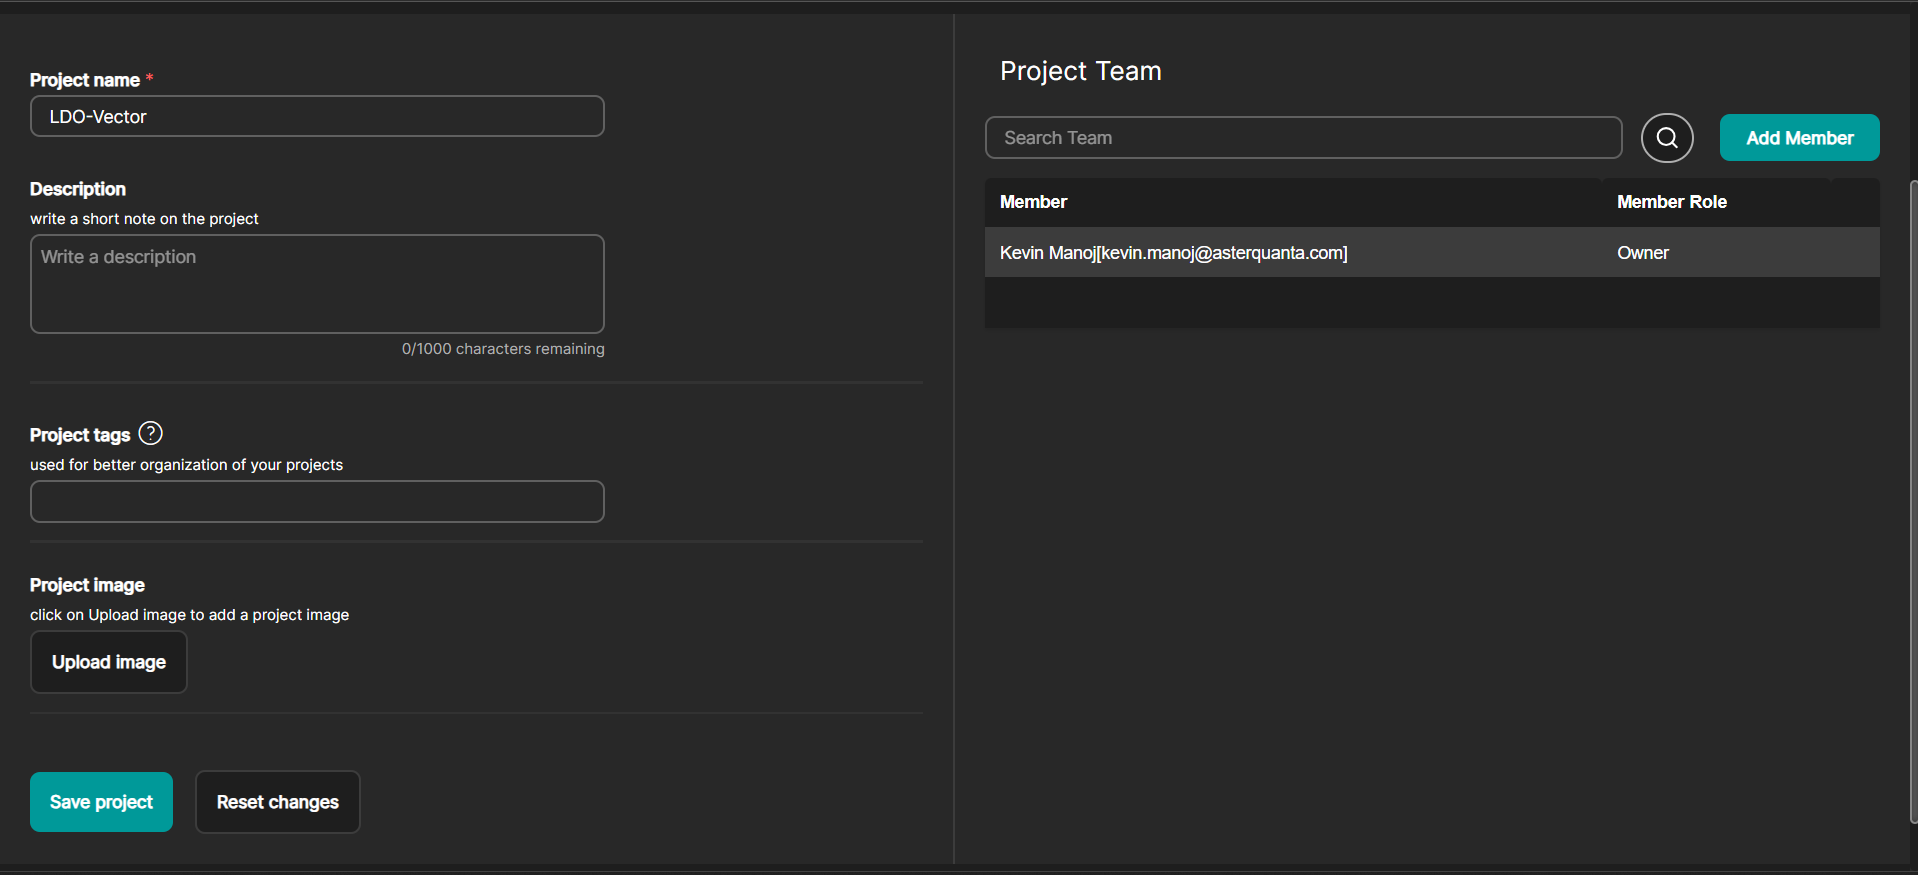
At any point, you can open Project Settings to edit project-level information:
- Project Name
- Description (optional)
- Project Tags (optional)
- Project Image (optional)
Available actions:
- Save Project
- Reset Changes
You can also manage your project team here by adding or removing members (available to the project owner).
5. Publish the Project
- Return to your project page and click Publish Project.
- Enter a publication name and choose Proceed or Cancel.
Once submitted:
- Go to the Projects page and open the Authorize Projects section.
- Approve the publication request by clicking the checkmark (✔).
After authorization, the project becomes public and will appear on the Public Projects page.