Managing Circuits and Testbenches
Overview
A testbench circuit is a simulated or physical environment used to verify the functionality of a design under test (DUT).
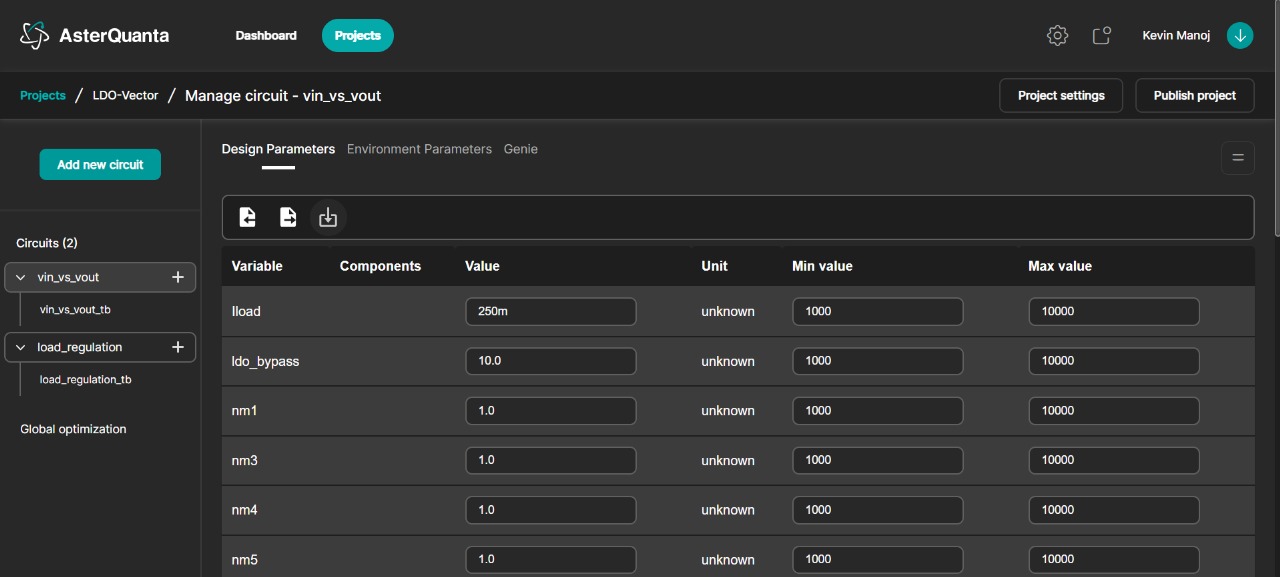
The Circuits panel in the Manage Circuit page allows users to organize and manage circuit configurations along with their associated testbenches within a project.
This section provides an intuitive hierarchical view of all circuits and their corresponding testbenches under the current project.
Interface Layout
- The Circuits panel is located on the left sidebar of the page.
- Each circuit group (for example,
vin_vs_voutorload_regulation) can be expanded or collapsed using the arrow icon next to its name. - Under each circuit, the corresponding testbenches (for example,
vin_vs_vout_tborload_regulation_tb) are listed.
Adding a Testbench
To add a new testbench under an existing circuit:
- Locate the desired circuit group in the Circuits panel.
- Click the ‘+’ (plus) icon next to the circuit name.
- Enter the required details for the new testbench when prompted (depending on your workflow configuration).
- The new testbench will appear nested under the selected circuit group.
Each testbench added automatically inherits the relevant environment parameters and can be configured independently under the Design Parameters or Environment Parameters tabs.
Example
In the example shown:
The project contains two main circuits:
vin_vs_voutload_regulation
Each of these circuits includes one testbench:
vin_vs_vout_tbload_regulation_tb
Users can add additional testbenches by clicking the ‘+’ icon beside either vin_vs_vout or load_regulation.
Key Notes
- Each circuit can have multiple associated testbenches for various simulation configurations.
- Changes made in one testbench do not affect others under the same circuit group.
- Testbenches can be renamed or deleted from their context menu (if available in your current build).